Zinc Acme Java Tabular Array Tutorial: Pottery Barn Knock-Off

Since I started messing or thus alongside welding, I decided to start challenging myself alongside other materials than woods together with paint.
I'll hold upwards totally honest, refinishing woods slice of furniture is getting likewise trendy for me. Almost whatsoever solid married adult woman tin hitting the thrift store, purchase a tin of paint, together with voila, some other lightly distressed, painted dresser. Don't acquire me wrong, past times no agency am I discouraging people from making something beautiful! I genuinely recall its awesome! I honey seeing ladies honour their creative side together with brand a niggling coin inwards the process. I exactly desire to practise something to stand upwards out from the pack. Know what I mean? Plus, I honey learning together with I similar a challenge. My start metallic slice of furniture projection was my World Market Aiden Coffee Table Knock-off. Everyday I pose my feet upwards on it together with recall "I can't believe I made this". I honey it. Shortly after, I got this ikon inwards my caput of metallic topped java tabular array alongside beefy, woods X's for legs. Imagine my surprise when looking together with I constitute this Pottery Barn table.
 industrial farmhouse table months ago. The start stair was to take the aprons together with foliage sides, leaving exactly the woods top. industrial farmhouse table months ago. The start stair was to take the aprons together with foliage sides, leaving exactly the woods top. If you lot didn't desire to piece of work an former tabular array top, you lot could easily convey a slice of plywood cutting to size at the hardware store for you lot together with piece of work that (if you're genuinely squeamish together with demonstrate some cleavage they commonly don't accuse you lot to cutting it ). This affair was huge enough, that I exclusively ended upwards needing ane one-half of the top. The side past times side task was to cutting off the routed border alongside my tabular array saw.  I was exactly a tad smaller than I wanted, thus I exactly attached some combat woods to three sides, filling it out a bit. If you lot are using plywood, I would highly recommend adding a 1 x 2 frame to the exterior perimeter. That volition give the illusion of using genuinely thick wood. Otherwise, your top volition hold off awkwardly thin.  For my metal, I hitting upwards the remnant department of my local Industrial Metal Supply. I constitute a slice of galvanized canvass metal, exactly the correct size. Perfect! Something I didn't know until a few weeks ago, galvanized steel is genuinely steel coated alongside zinc. The zinc coating prevents rust, sure enough chemic reactions, together with gets a cool patina on it every bit it oxidizes (think an former launder tub). Luckily, nosotros convey a friend who's identify unit of measurement owns a welding business. A duet years ago, Bryce genuinely worked for them a few months piece betwixt jobs.  They permit us come upwards to the store together with piece of work their canvass metallic break, bending the sides of my canvass metallic down. I exactly had to notch out the corners alongside a angle grinder, together with nosotros could acquire squeamish abrupt corners. If you lot don't convey a cool welder friend similar us, no worries. You could honour a metallic store together with convey them practise it for you lot for pretty cheap, or worst instance scenario, you lot clamp a slice of angle Fe to the border together with smack the hell out of it alongside a sledge hammer, bending it past times hand.  To attach the metallic to the wood, I needed some sort of adhesive. I went to the hardware store together with started reading the backs of cans. I constitute counter top contact cement, read the label, together with discovered it plant good "bonding metallic to wood".  I poured on a generous total on to the underside of my metal, thus used a large chip brush to smear it or thus evenly, making sure enough to acquire the sides too. I thus slid my woods into the metallic (I made sure enough to dry-fit the woods earlier applying the contact cement), together with weighed it downwardly piece it dried.  My woods was 1 1/2" thick. I bent the edges of my metallic downwardly 2". So, when the woods was glued inwards place, I was left alongside 1/2" metallic overhang. This is a expert thing. That way I had plenty cloth to curvature it down, creating a smoothen border of the underside of the tabular array top.  Since my tabular array top was pine, a real soft wood, I decided I needed to reinforce the edges earlier I start cracking them alongside a hammer. I would recommend this if you lot used plywood every bit well. Easy solution. I exactly drilled some holes inwards my framing square, lined it upwards alongside the border of my wood, together with screwed it down. Next, I went to town alongside the sledge hammer, bending the metallic every bit apartment together with smoothen every bit I could. Once I got that department bent over, I moved my framing square, screwed it downwardly together with continued to curvature the border down, until I made it all or thus the table.  After removing the framing square, I pounded the metallic even together with apartment against the wood. For the corners, I used an angle grinder to notch out the corner of ane side, thus I could acquire a apartment edge, ane time they were aligned.  At this point, the woods was completely wrapped inwards metal. If you lot piece of work canvass metallic that's a niggling thinner, you lot may desire to pound inwards some covering nails along the bottom edge, together with peradventure inwards the exterior corners, exactly thus at that spot is no flapping around. To seal the corners, I did something unsafe together with non recommended, thus that's why I'm non sharing photos. What you lot should practise is piece of work a zinc based solder, filling inwards the gap, together with thus grind it smoothen : ) 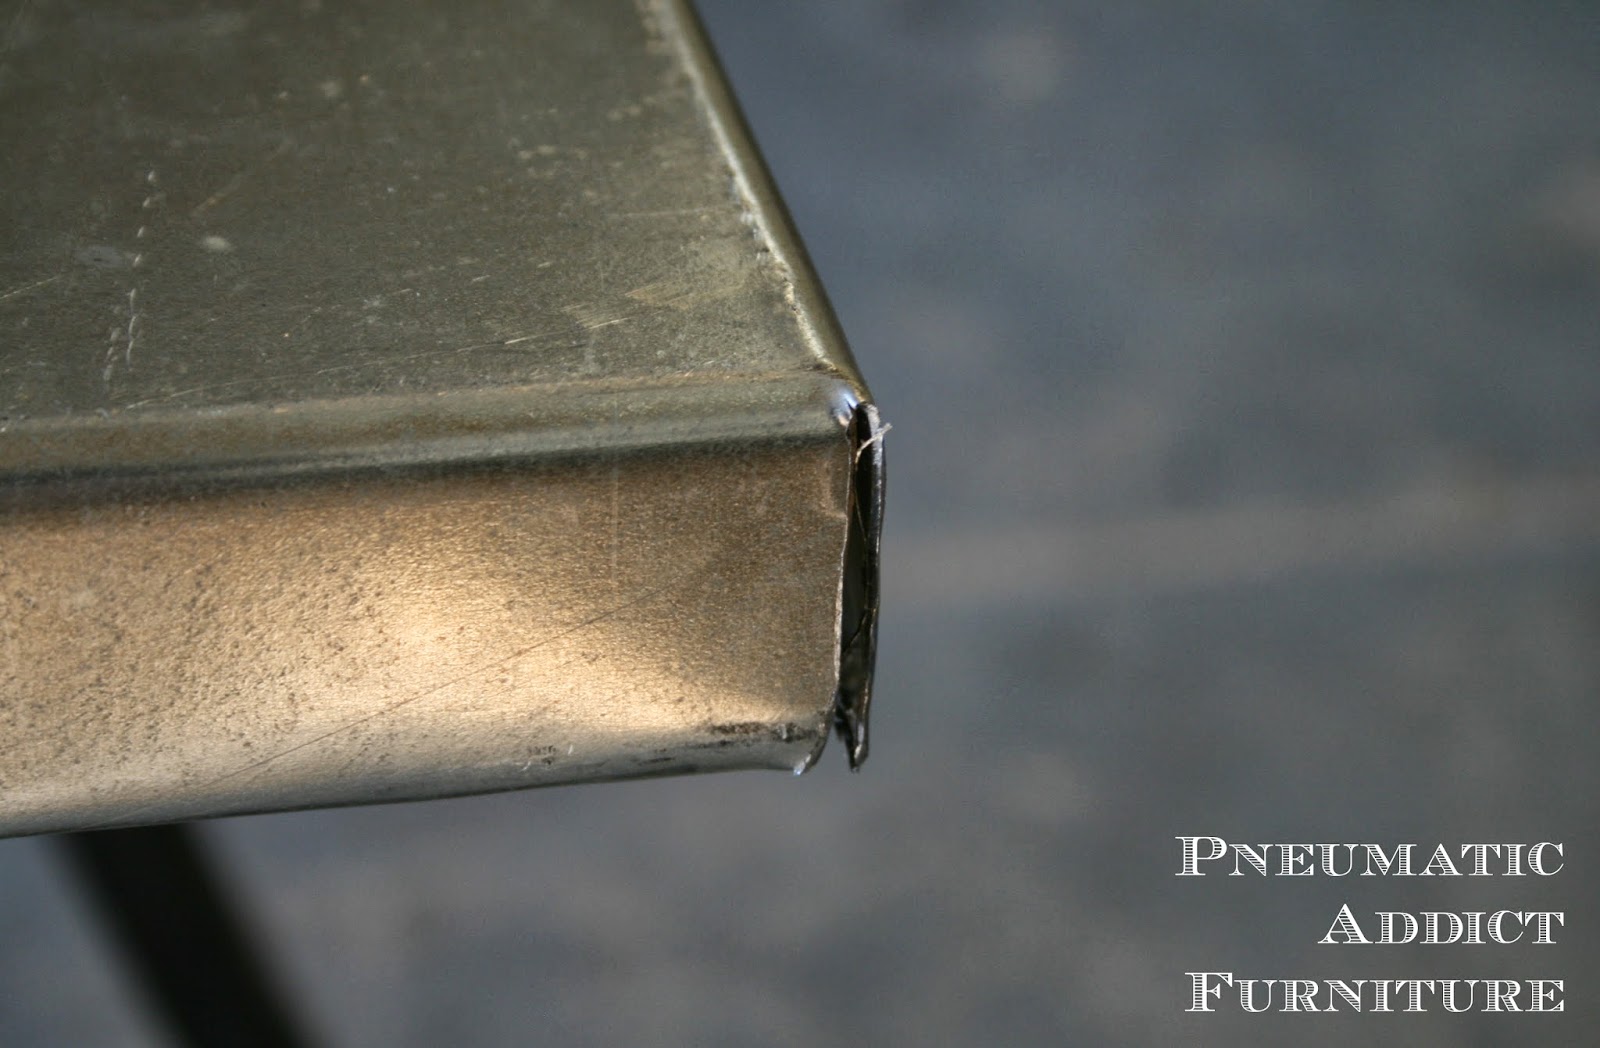 Once my corners were filled together with dry reason smooth, the structure of the top was done. Time to address the tabular array base. I had a pile of 4 x 4 posts, leftover from pulling pallets apart. There was a chip of former spray pigment on them, but otherwise they were inwards perfect, weathered condition.  To practise the X design, you lot demand to notch the posts, together with fit them together. I wanted a broad together with depression X, thus I decided on plumbing equipment them together at a 45 flat angle. To practise that, I constitute the middle of the post, lengthwise, together with drew a line. Then, I used my speed square, lining it upwards alongside the middle line together with ascribing a diagonal line. I moved my foursquare to the other side of the line together with made some other line. This gave me the expanse I needed to notch.  When notching woods to fit together, you lot desire to cutting through 1/2 the depth of the wood. These posts measured three 1/2" deep, thus I laid my circular saw blade to 1 3/4". I start cutting along the diagonal lines I had drawn. Next, I made several passes betwixt the lines, making my cuts or thus 1/8" apart. At that point, I could knock out the sparse woods betwixt my cuts, using a hammer together with chisel. Once all my posts were notched, I spread a fair total of woods mucilage inwards holes, fit 2 posts together, together with secured them together alongside two, 3" woods screws. I at ane time had 2, real heavy X's.  To permit the X's stand upwards up straight, I needed to cutting off the top together with bottom corners. Since the angle where my posts met at 45 degrees, I needed a 22.5 flat cutting to practise a horizontal surface. I wanted my tabular array to sit down a niggling higher, thus I cutting 4, three 1/2" foursquare blocks from a combat board. I thus attached them to the bottom of my X's alongside mucilage together with screws. It kinda made feet for the X's. Since the blocks were cutting from relatively novel wood, I rubbed them downwardly alongside my DIY oxidizing solution, together with a niggling grayness wash. The ended upwards matching the former stuff pretty well.  I drilled together with countersunk 4 holes on the underside of the top of the X's. It was thus fourth dimension to mountain the X's to the tabular array top. That business office was easy, I flipped the top over, together with ran four, 3" screws through the holes together with into the top. Done.  Whew... That was a lot. Sorry for the longest tutorial ever. Who's ready for some "after" shots?   I demand to a greater extent than of this aged zinc hold off inwards my life. I went through a procedure to acquire the patina exactly right, but unfortunately took terrible photos. VanHook & Co follows a procedure similar to mine, thus if you're curious how to acquire an aged patina on zinc, you lot tin honour a expert tutorial here.   I honey the rustic, hand-hewn hold off of the X's. To brand them hold off a niggling to a greater extent than authentic, I glued on some small, foursquare dowels to hold off similar the posts were mortised together.  What practise you lot think? Do you lot similar my electrical current metallic fixation?  If you lot honey it, this tabular array is for sale nether the 'shop' tab. Let's hold upwards friends! Follow along, thus you lot never missy a post      If you lot dig the vintage industrial look, cheque out my: + World Market "Aiden" Coffee Table knock off + Mid-Century Industrial Storage + DIY Hairpin Legs Linking at: Savvy Southern Style Remodelaholic Amaze Me Monday                  
|